
Six steps to activate and set up GA4
Our six steps to set up a basic GA4 property:
Step 1 - Prepare old UA property
On July 1st, if a UA property has not been migrated to GA4, Google will automatically set up a GA4 property. This is not a good idea. GA4 is very different to UA. It needs to be set up to your specific needs. Automatic set up may (and probably will) apply settings not appropriate to your requirements. Automatic set up needs to be turned off.
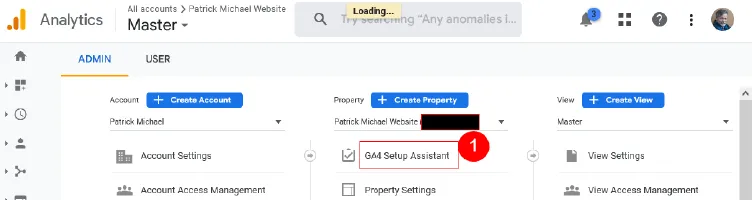
- Log in to your UA property and go to the Admin section -> GA4 Setup Assistant
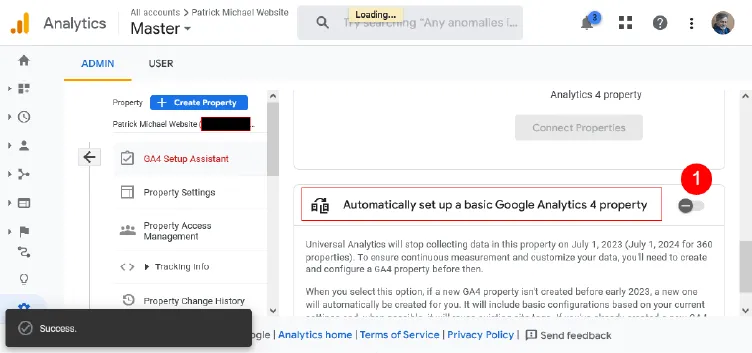
- Turn off Automatically set up a basic Google Analytics 4 property.
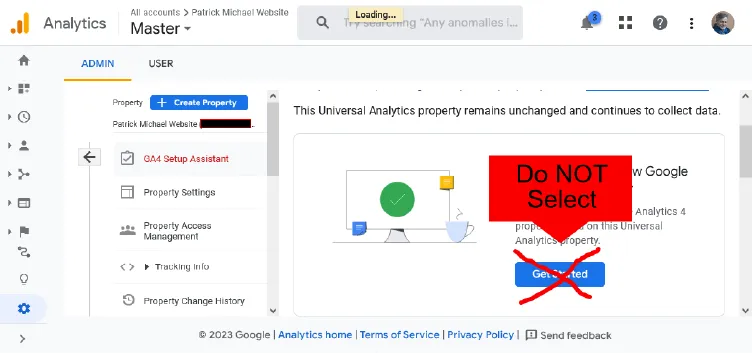
- Further up in the Setup Assistant, DO NOT create your property using the Get Started button under 'I want to create a new Google Analytics 4 property based on this UA property'. The property will be linked after the setup process.
Create GA4 property
We will now create your GA4 property.
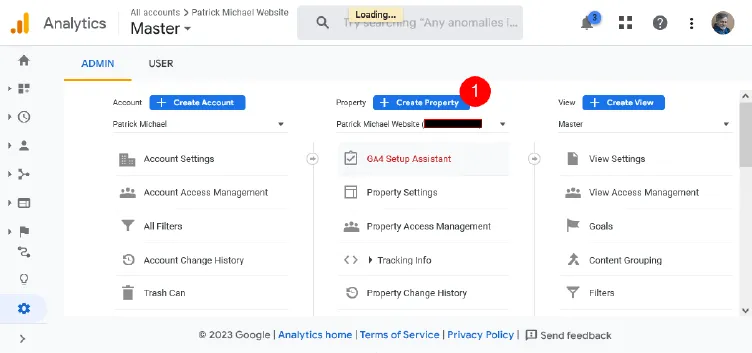
- Still from the UA Admin section, click the + Create Property button.
On the Create property screen, fill in the required information:
- Property name;
- Reporting time zone;
- Currency.
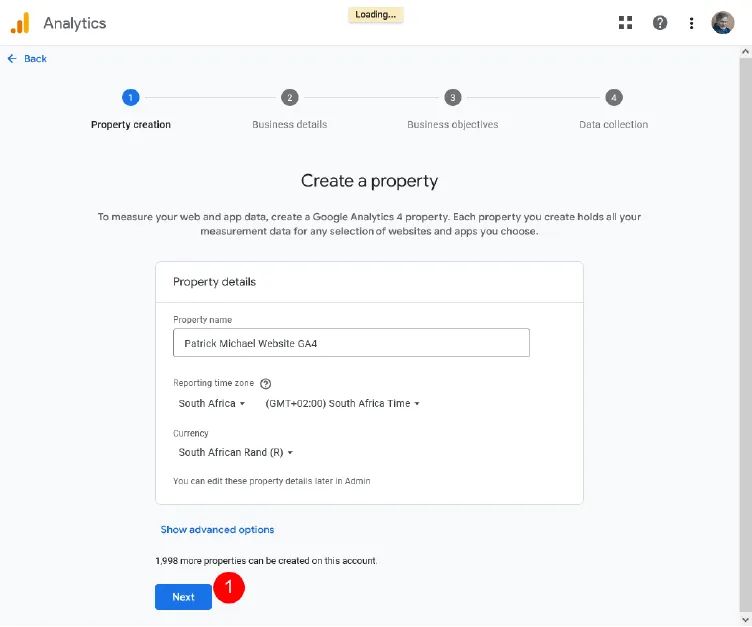
Click Next.
You will be asked to Describe your business, Industry category and business size.
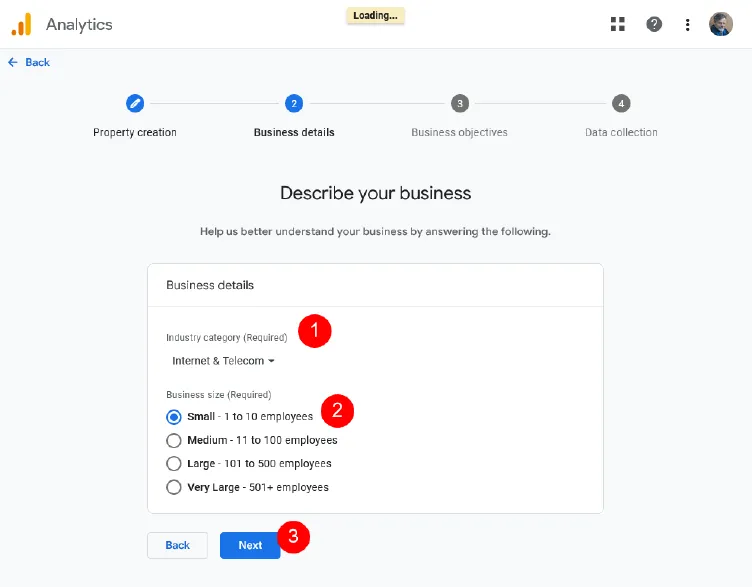
Click Next.
You will then be asked to Choose your business objectives.
You can select one or all of the top four or Get baseline reports. For now, I would select the baseline reports option.
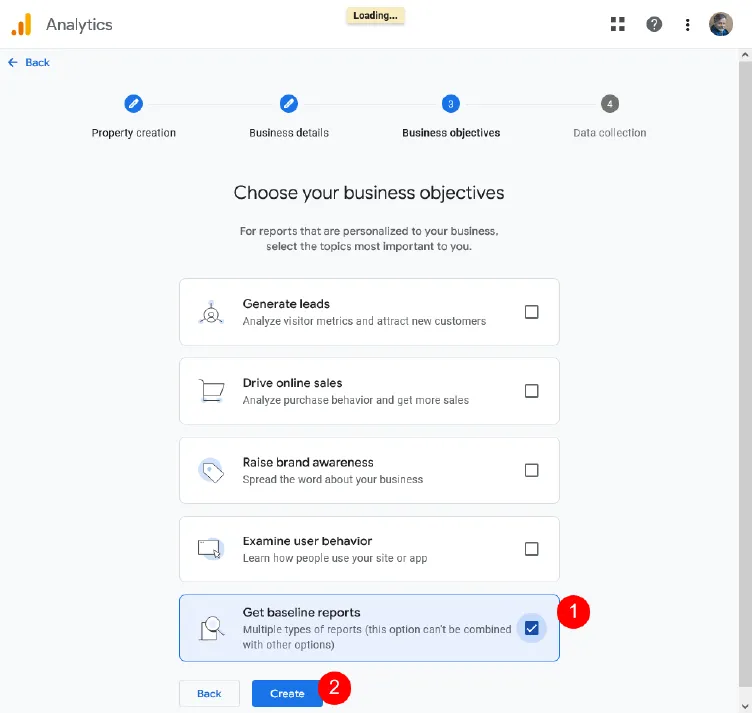
Click Create. In essence, your property has now been created. The next step is creating a Data stream.
Step 3 - Create data stream
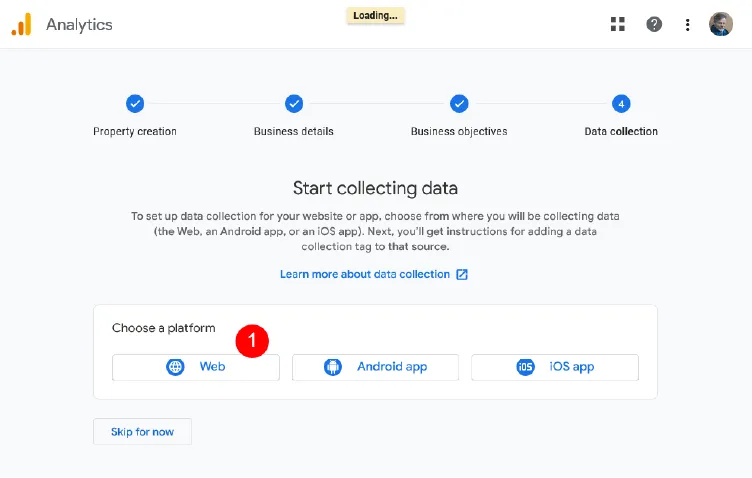
In step 2, we created a property. You will be shown the Start collecting data screen. This is where you start setting up your data stream. You can come back to this later.
- Choose a platform - Web
The Set up data stream screen will be shown. Fill in your website URL (specifically select https://) and Stream name. Leave Enhanced measurement on.
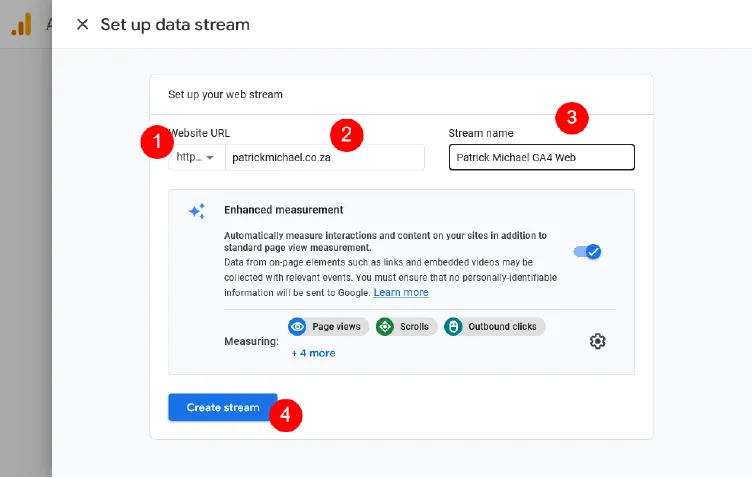
Click Create stream.
You will be shown an Installations instructions screen. Because we are using Google Tag Manager (GTM), we choose the Install manually option.
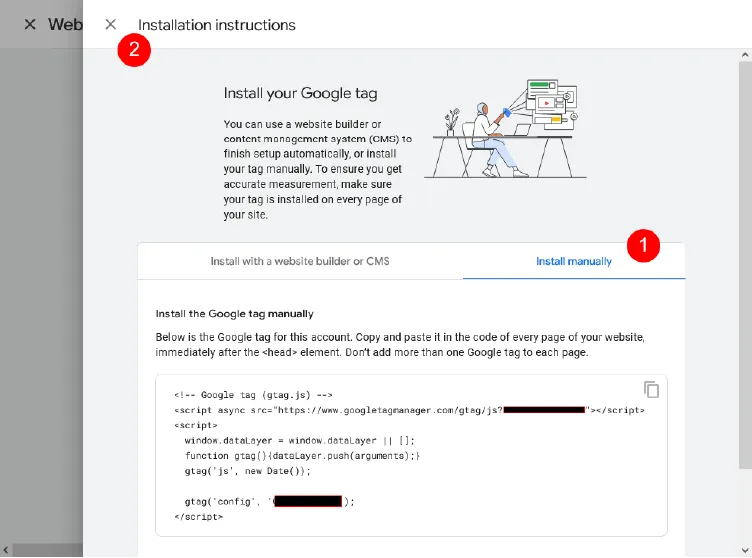
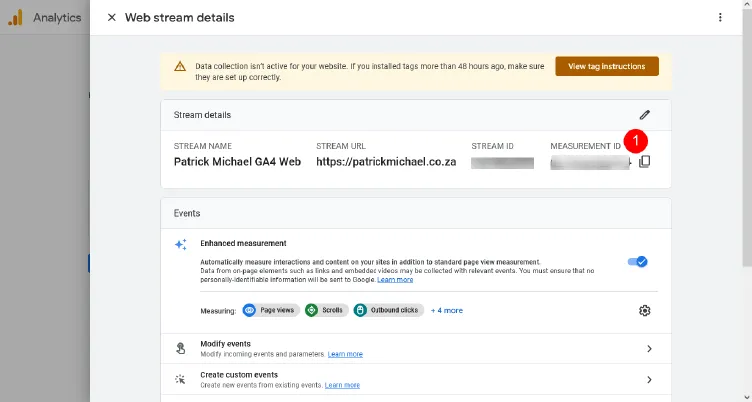
You can close the Installation instructions screen, as we will use the MEASUREMENT ID number from the Web streams details screen.
We will now set up Google Tag Manager (GTM), which is Step 4.
Step 4 - Set up Google Tag Manager (GTM)
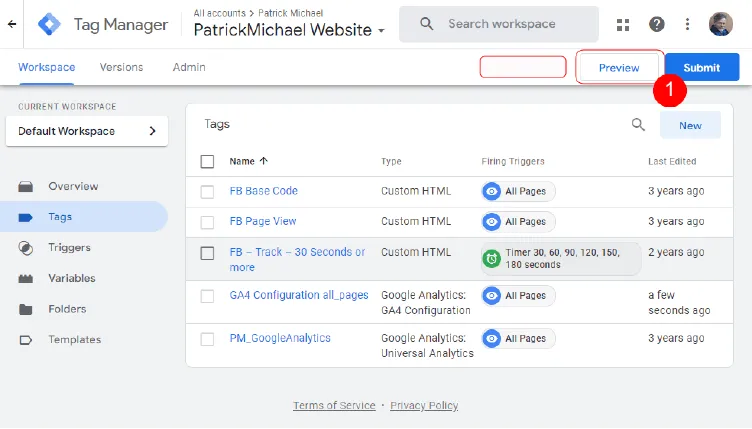
Log in to your GTM account and go to Tags. Select New.
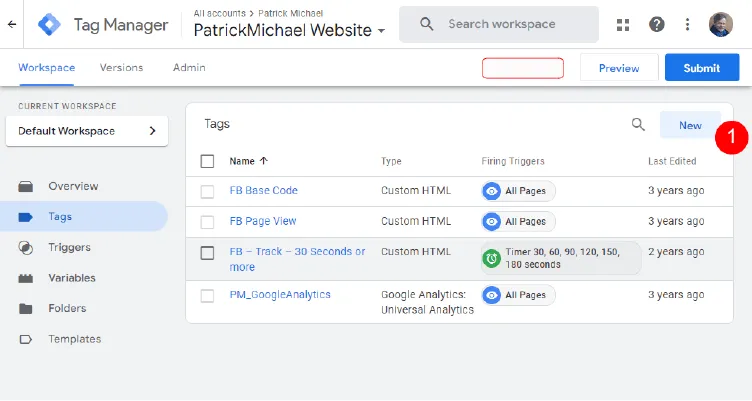
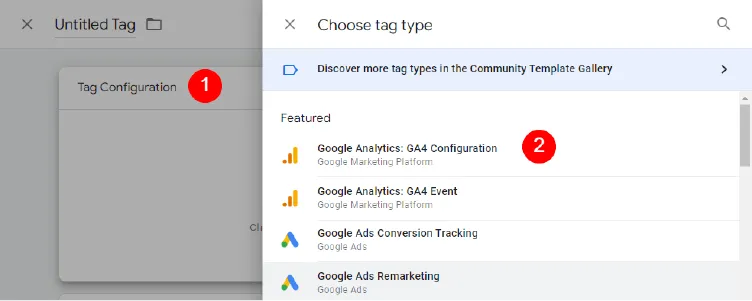
In the New tag screen, click Tag Configuration. Select Google Analytics GA4 Configuration.
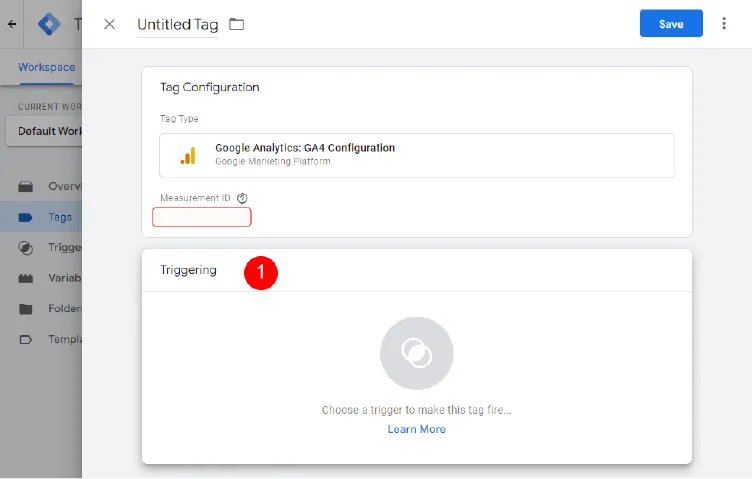
Enter your MEASUREMENT ID from the GA4 property Stream details screen. See Step 3.
Click Triggering.
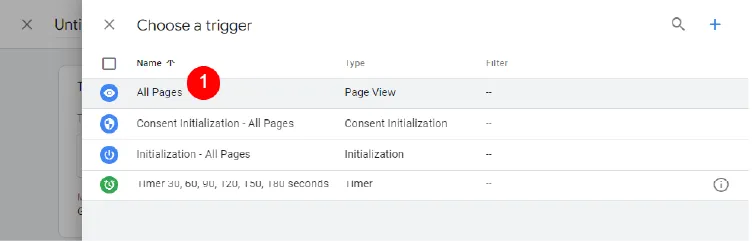
Select All Pages.
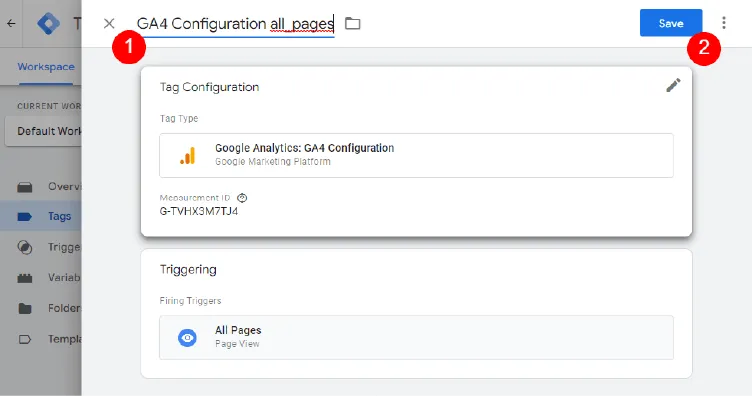
Name the tag along the lines of GA4 Configuration all_pages. Click Save.
Click Preview.
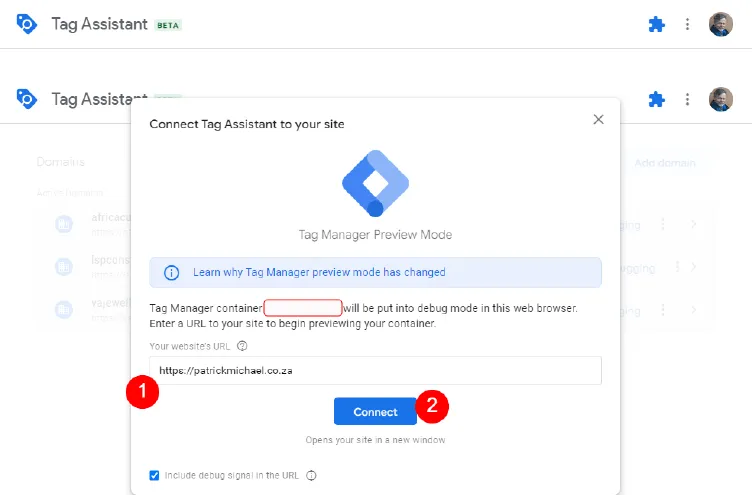
This is now the Tag Assistant debug process. Enter your website address for which we are setting up the GA4 property. NOTE: The site needs to be enabled with GTM.
Click Connect.
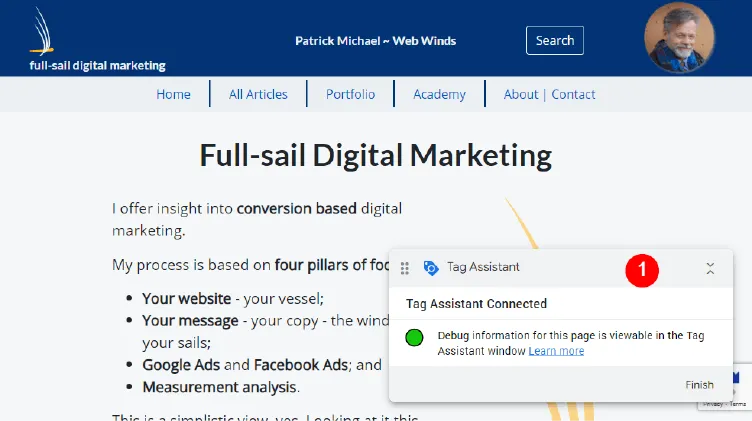
Your target site will show in a new tab. Tag Assistant will show if it is connected for debugging.
Come back to Tag Assistant and click Continue.
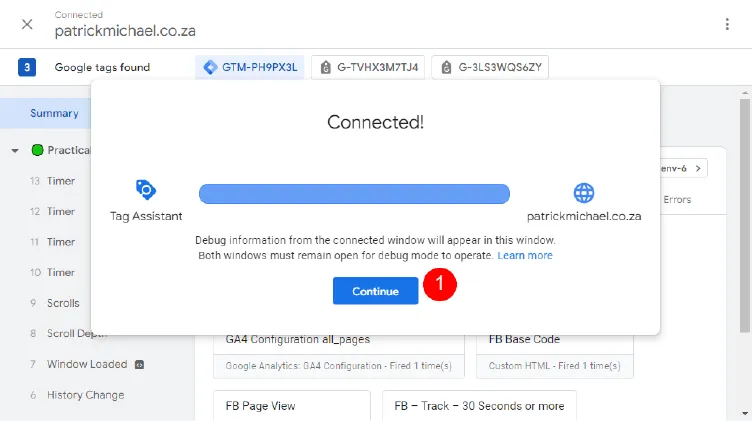
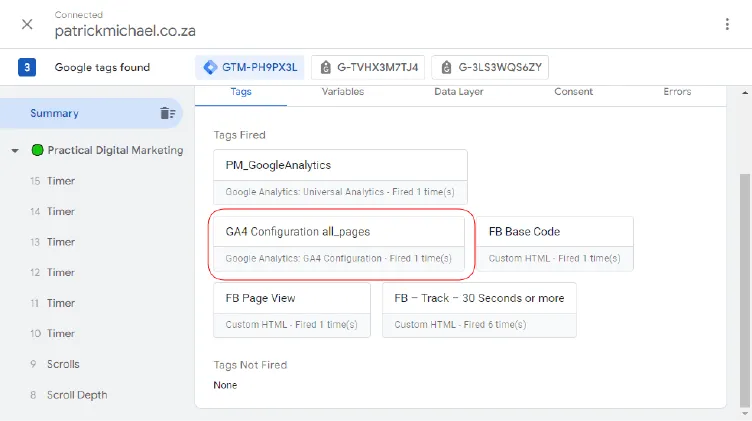
If successful, you will see that the GA4 tag has fired.
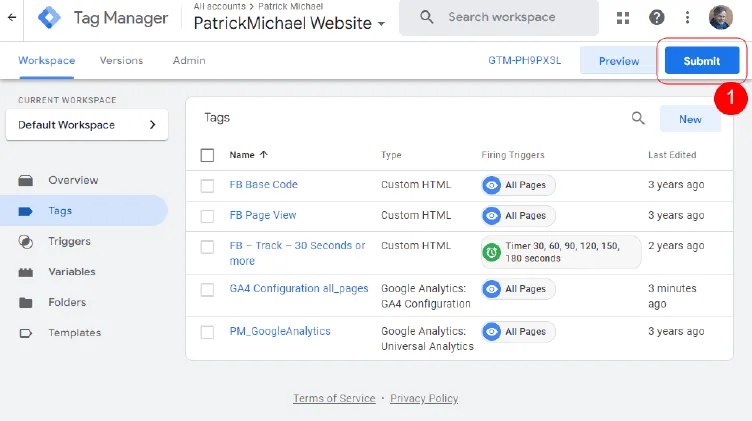
Close Tag Assistant windows and go back to Tag Manager. Click Submit. This will publish the new tag.
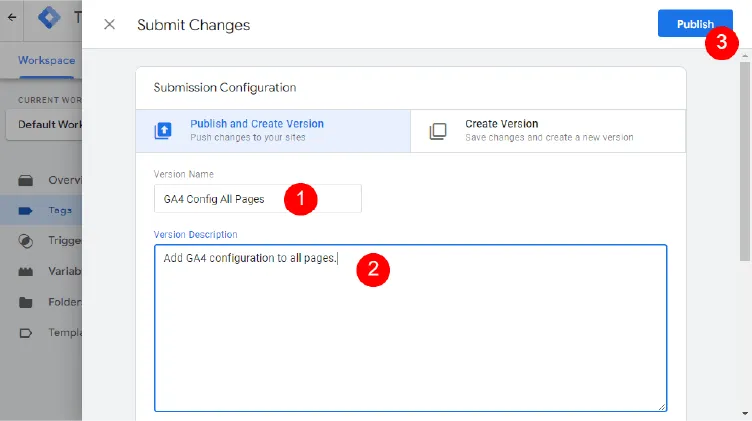
Enter a name and description for GTM version history. Click Publish to complete the process.
You can now go back to your new GA4 property to do further checks. We will also finish the setup, which is Step 5.
Step 5 - Set up the property
We will now do additional checks to ensure data is being collected. In your new GA4 property, go to the Admin section.
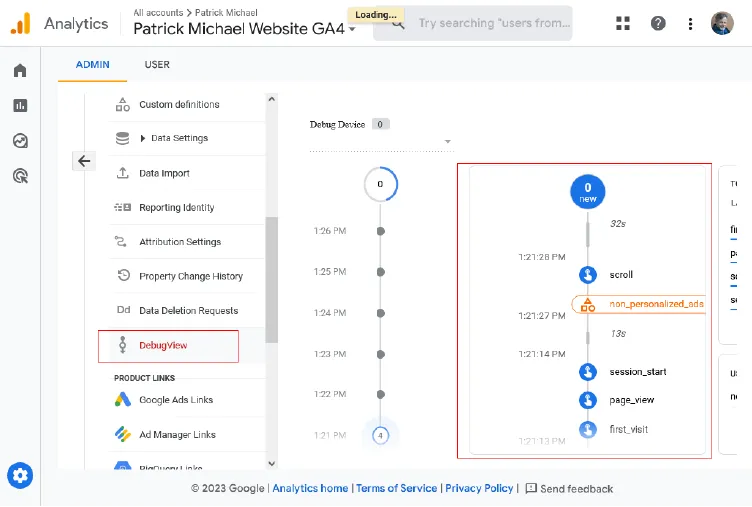
On your website, click a few pages. This will generate some tag firing activity. In the Property settings scroll to the Debugview. You should see activity.
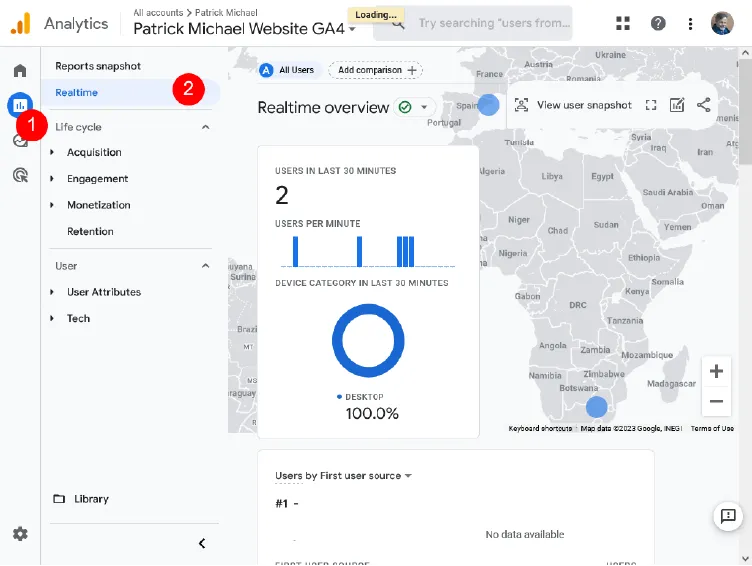
You can also go to the Realtime report in the Reports tab. You should see your activity, and any other, reflected.
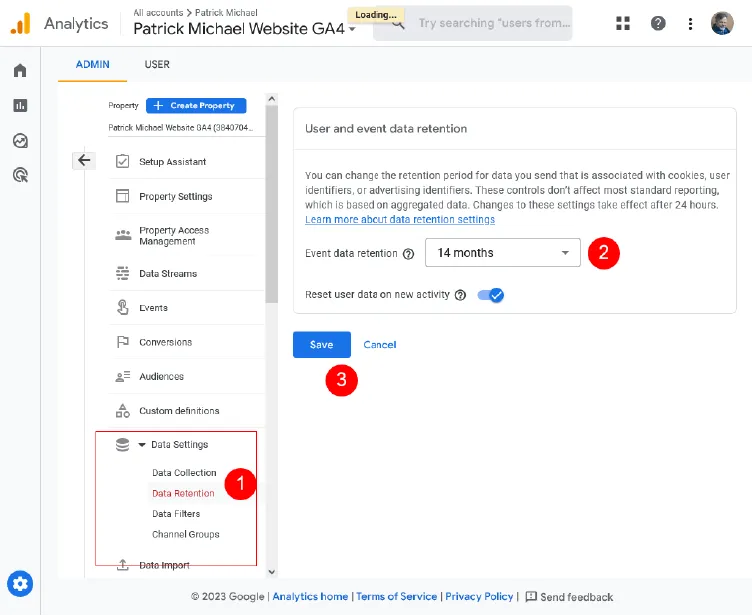
We can now finish our setup. In Data Settings -> Data Retention, change Event data retention from 2 to 14 months. Click Save.
Go to Reporting Identity, expand the options so that you see Device Based. Use this identity for minimum data modelling. This selection is made for small sites, Google Signals is turned off and Google Ads is not being used. You would experiment with these settings over time. When a change is made, the reports are re-calculated.
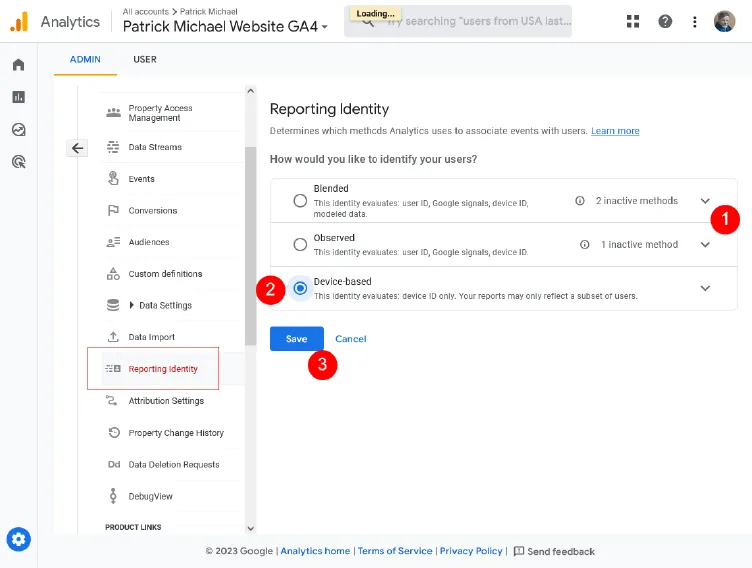
Click Save.
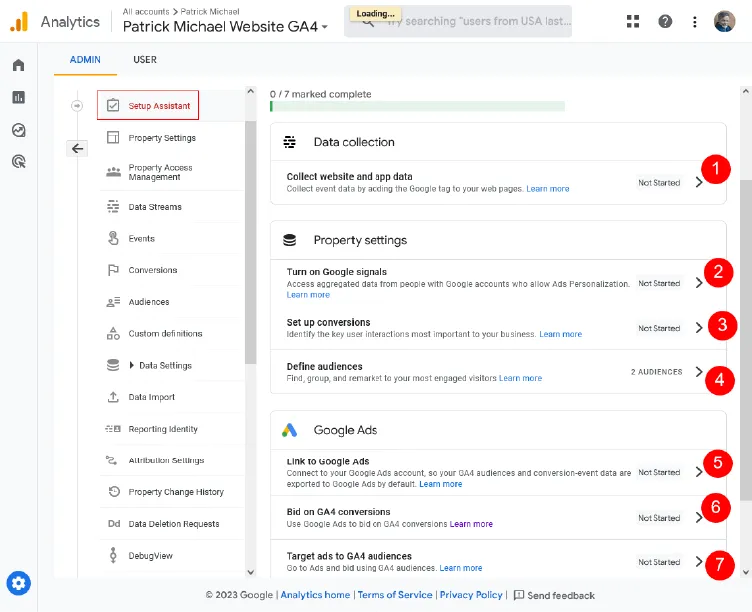
In the GA4 property, go to the Setup Assistant. We are going to complete the 0 / 7 marked complete process.
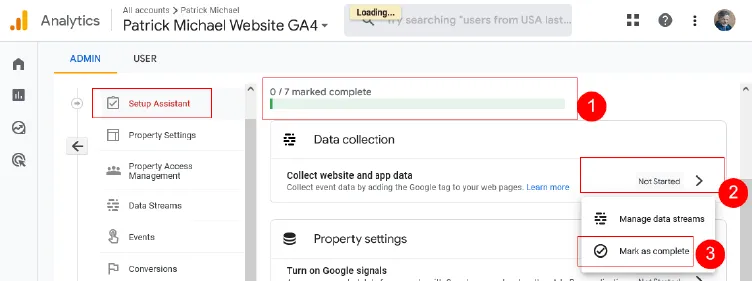
Under the Data collection, Property settingsand Google Ads sections, mark each as complete. These will be looked at later on in your GA4 journey.
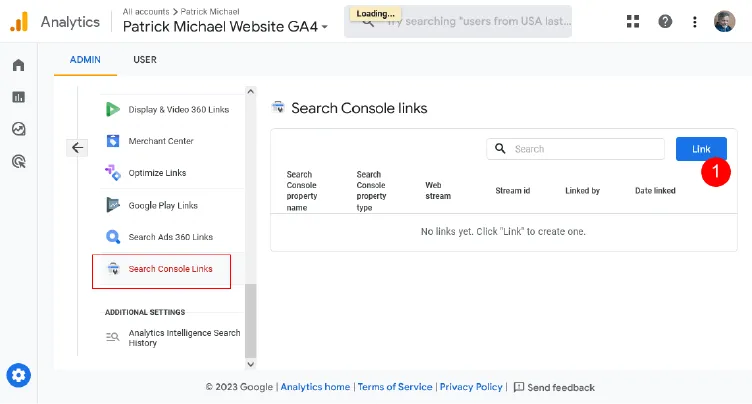
You can now link your Search Console if you have one set up. In the property Admin bar, scroll down to Search Console Links. Click Link.
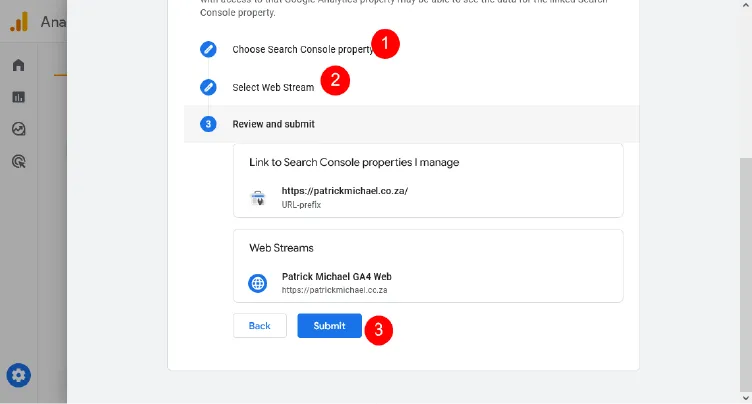
Select your Search Console property, Web Stream (this GA4 stream), and review and submit.

We will now do the final step, Step 6, which is to link your old UA property to this one. NOTE: this is in the case of 'migrating' a UA property. If you are not migrating, or do not have a UA property to link to, your GA4 property is good to go.
Step six - Final checks
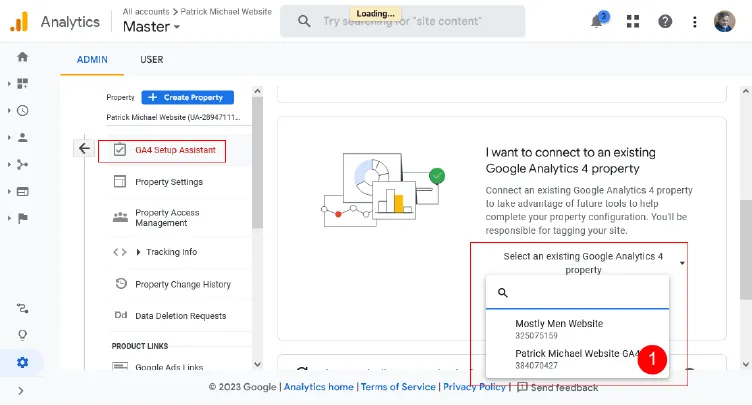
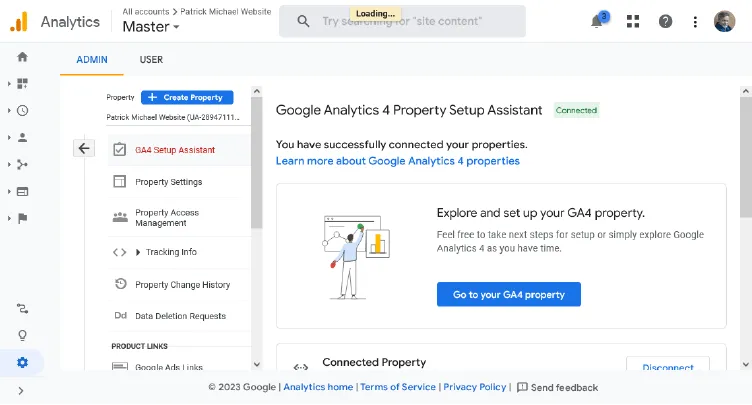
Go to the UA property, Adminsection that you wish to link to GA4. Go to the GA4 Setup Assistant. Under I want to connect to an existing Google Analytics Property, find and select the GA4 property you have just created. If all goes well, you will then see a button Go to your GA4 property.
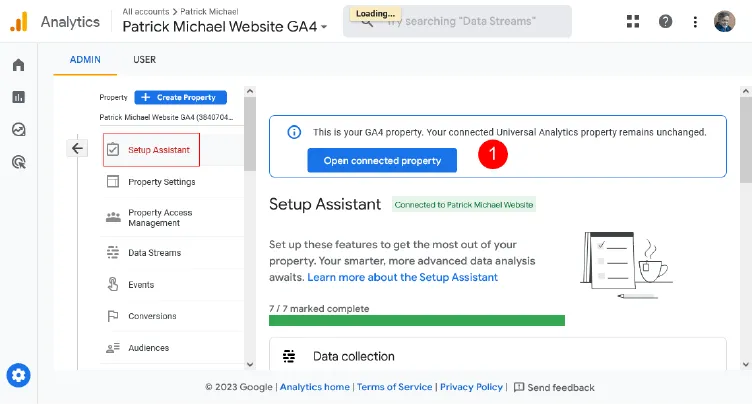
By clicking the button, you will be taken to the corresponding Setup Assistant in your GA4 property. Here you will see a reciprocating button back to the UA property.
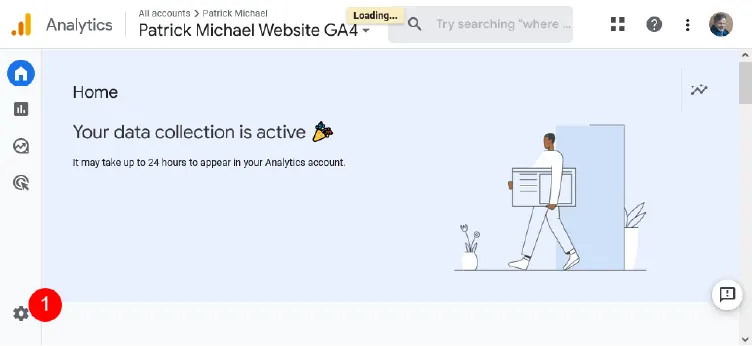
If you go to GA4 home, you should see Your data collection is active.
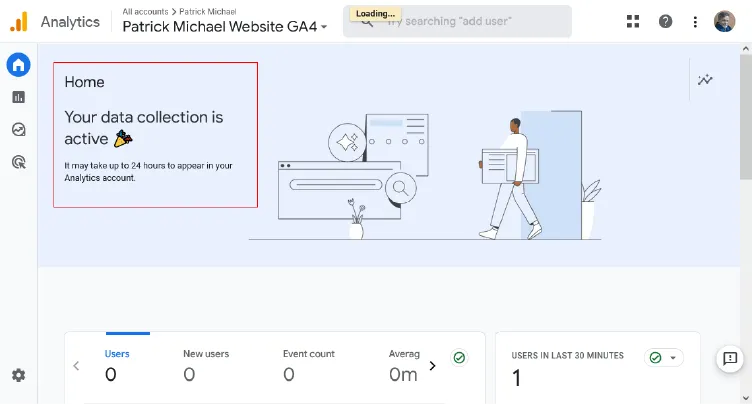
Your are done!
Related Articles
Hire Me? Lets talk!
I am available for remote freelance work to select clients. Please contact me
Add new comment