The Topic: Establishing flexibility and control within your Drupal hosting environment. This article steps through the process of spinning up an Ubuntu cloud server (Droplet) on Digital Ocean. Digital Ocean is my go-to cloud server hosting provider. I have been using Digital Ocean for over 10 years now, with very few complaints and issues. Sign up to Digital Ocean and get $200, 60-day FREE credit for new users. Please note, if you sign up using this link, I may get a small commission.
This article is one of a series. The full series covers:
- Creation of the Ubuntu cloud server (Droplet);
- Set up of sudo user;
- Setting up of private / public key authentication to log in to the server;
- Set up of firewall;
- Install PHP, Apache Web Server, MariaDB;
- Set up of Virtual host; and
- Install Drush and Composer;
This article will cover points 1 - 3, create droplet, set up sudo user and set up public / private key authentication.
The Process
Below are the steps to take.
- Create a Digital Ocean Account;
- Create a 'Droplet';
- SSH into your droplet;
- Create sudo user; and
- Set up key authentication.
1. Create Digital Ocean Account
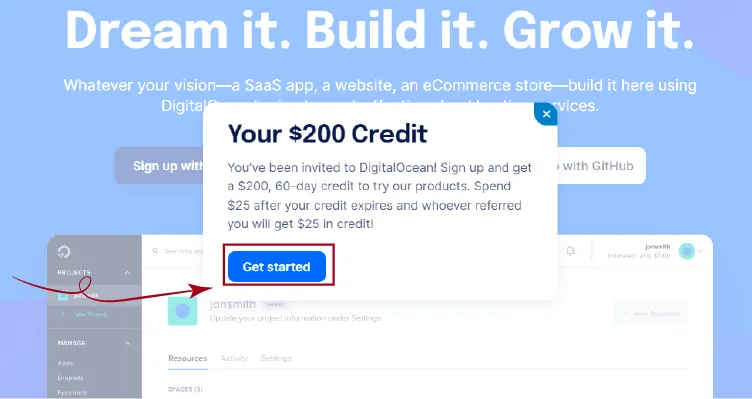
Hop over to Digital Ocean and sign up. Digital Ocean is offering $200, 60-day FREE credit for new users. If you wish to support me, you can click this link (I may get a small commission) to sign up. Else got to Digital Ocean and click the 'Sign UP' Button.
2. Create Droplet
Cloud servers on Digital Ocean are called Droplets. Let us create our Droplet. Sign in to your account and click 'Create'.

You will be directed to the create droplet screen. Refer to the image 'Build your Droplet' below.
Build your Droplet
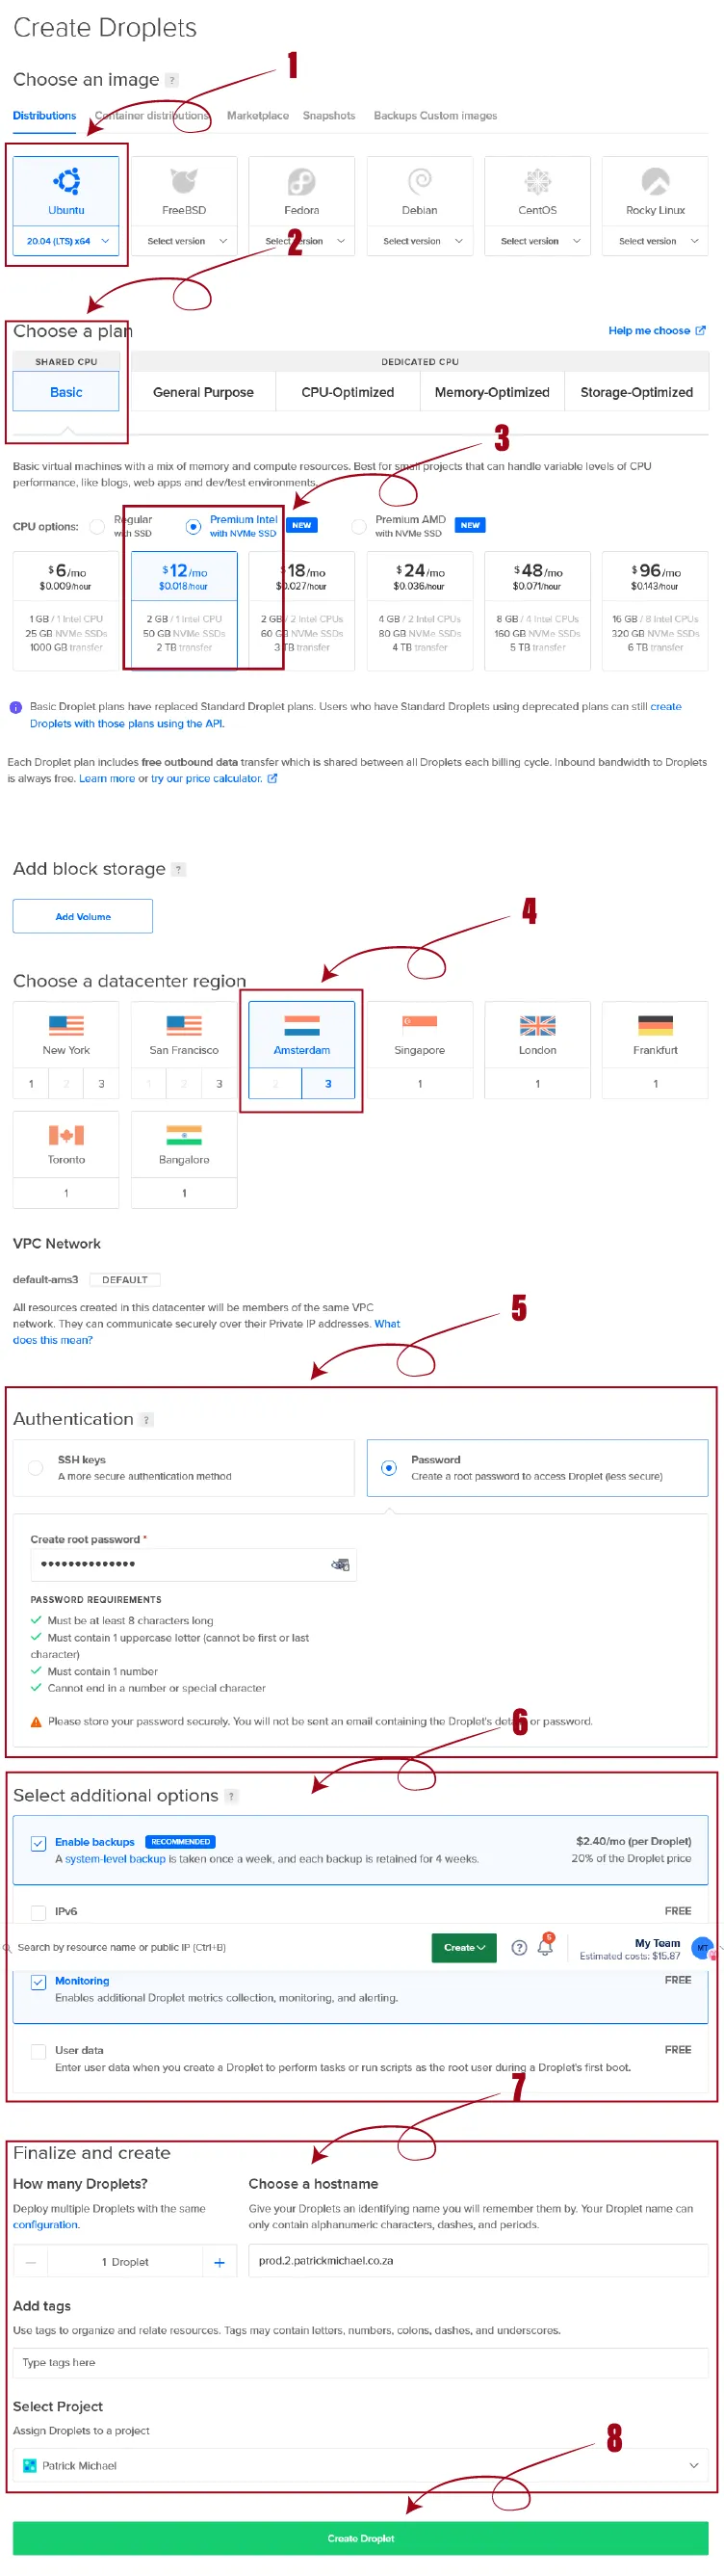
Choose an image
There are various flavours of LINUX to choose from. I use the latest Long Term Stable (LTS) release of Ubuntu.
Within the Marketplace, you will find pre-configured images that you could deploy. This may save a bit of time, however I prefer to build from scratch.
Image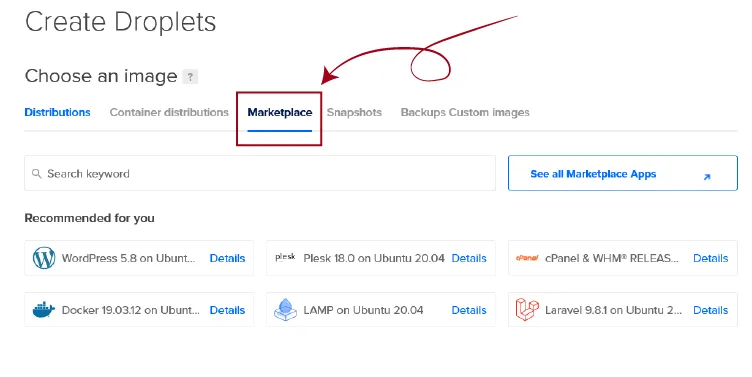
Choose a Plan
One of the many great advantages of Digital Ocean (DO) is that they cater for all requirements. Entry level to high performance. At any point, you can upgrade or downgrade your server. You have options of shared or dedicated CPU.
- Shared or dedicated CPU
- Intel or AMD CPU
- Variable RAM, CPU count, SSD storage capacity and monthly transfer capacity.
Choose options
Within shared or dedicated CPU, you have options of:
- Intel or AMD CPU
- Variable RAM, CPU count, SSD storage capacity and monthly transfer capacity.
Choose datacenter region
DO has datacenters around the globe. Choose your area.
Choose initial authentication option
You have the option of SSH keys or Password. Because this is a brand-new server, we need to choose Password. We will configure SSH keys later in the process. Enter a STRONG password and keep a record of this password in a secure place. I use LastPass for my password management.
Store all your server details in Secure Notes on a service such as LastPass
You can use SSH key if you are spinning up a droplet from an existing backup or snapshot image that already has SSH keys configured.
Select additional options
Here I enable backups and monitoring. You also have options of IPv6 and User Data.
Finalize and create
We are creating one Droplet. I always name the Droplet something meaningful. prod.x.patrickmichael.co.za for example.
Create Droplet
The green 'Create Droplet' button will be enabled if the required information has been given. If not, the button will be disabled.
3. SSH into your Droplet
We will now SSH into your new Droplet to perform certain tasks. To do this we will log in as root. For SSH, I use PuTTY.
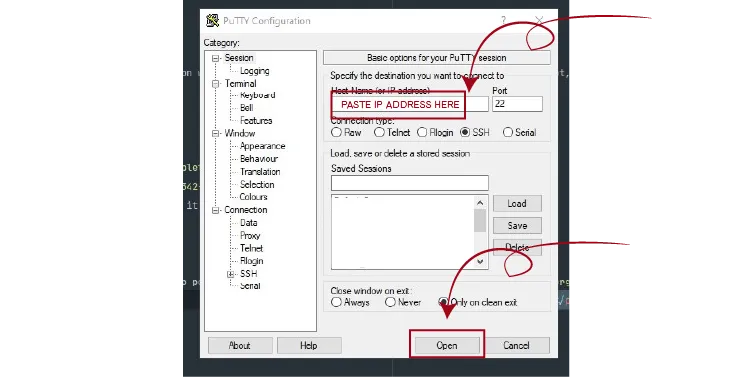
Download the client, if you have not done so, and launch a PuTTY session. To SSH into your Droplet, you will need the IP address assigned to your Droplet. The IP address is shown next to your Droplet name in your list of Droplets. Hover next to the IP address, a 'Copy' button will show, click 'Copy'.
Paste the IP address into PuTTY and leave the port on 22. Click 'Open'.
Because this is the first time you are logging in to the server, you will be shown a PuTTY Security Alert. Click 'Yes' to proceed.
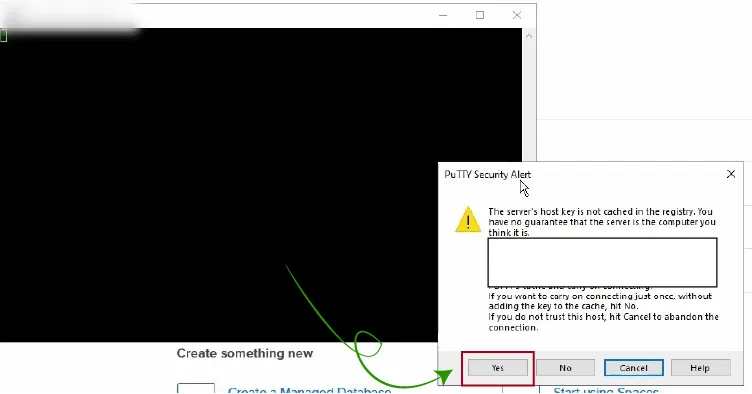
You will be presented with a (black) command line terminal. At the prompt, enter root. You will be asked for a password.
4. Create sudo user
The first task is to create a sudo user. We can elevate a sudo user to root privileges temporarily. This is often required for managing file and directory permissions within the Drupal environment.
To create a sudo user, as root, run the following commands:
- @dev1: adduser user_name
You will be prompted to:
- add and confirm a password for the user
- enter information about the user such as name, work phone, home phone etc.
You will be prompted to confirm the details entered. (y) Enter. User of user_name has now been created.
- Convert the new user to sudo user: @dev1: usermod -aG sudo user_name
5. Set up SSH keys
We will now enable SSH keys for the new user created. Before doing this you will need a private and public key pair. I use PuTTYgen to generate my keys. It is recommended to create using SSH-2 RSA with 2048-bit key size. This tutorial explains how to use PuTTYgen.
It is a good idea to create a passphrase when creating the key pari. The passphrase is used when logging in.
To set up SSH keys, either log in to the server as your new user or as root enter su user_name . Run the following commands:
- cd $home
- mkdir ~/.ssh
- chmod 700 ~/.ssh
- vim ~/.ssh/authorized_keys . This will create and open a new file named authorized_keys in the vim text editor. Paste your public key into this file. Save the file :wq! .
- chmod 600 ~/.ssh/authorized_keys
We will now enable SSH key pair login.
6. Enable SSH key pair login
To enable us to login using SSH keys we need to enable this in the sshd_config file. Run the following commands:
- sudo vim /etc/ssh/sshd_config This will open the sshd_config file for editing.
- Find PasswordAuthentication and change it from yes to no.
- Find PubkeyAuthentication and set it to yes.
- Find ChallengeResponseAuthentication and set it to no.
- As an additional measure, you can change the default SSH port to something else.
- Reload sshd: sudo systemctl reload sshd
Before closing your PuTTY session, you should now test the login with SSH keys by launching a new PuTTY window and logging in with the Key pair.
If all goes well, you have successfully spun up a cloud server on Digital Ocean and enabled SSH key pair login for a sudo user.
Interested in trying Digital Ocean? Digital Ocean is offering $100, 60-day FREE credit for new users. If you wish to support me, you can click this link (I may get a small commission) to sign up.
To follow on, I will be creating articles on how to:
- Set up a firewall on your cloud server;
- Install PHP, Apache web server and MariaDB your cloud server;
- Set up a virtual host on Apache;
- Install Composer, Drush and
- Set up GIT.
Hire Me? Lets talk!
I am available for remote freelance work to select clients. Please contact me
YouTube
This tutorial has a companion video on YouTube.
Add new comment